(864) 710-7964
info@rrrtoolsolutions.com
308 Lightfoot Road, Abbeville, AL 36310
Suzuki DR650 Mini Adventurer – Turning the DR Into a Mini Adventure Bike – Part 2

Part 2 of our Suzuki DR650 Mini Adventurer – Turning the DR Into a Mini Adventure Bike series will focus on the Discoveries and Modifications made to my 2013 DR650 in preparation for and after our TAT Trial (Trans America Trail). The Electronics, Rain, Mud, Communications, and Full Gear experience would be an almost perfect shakedown of Rider, Gear, and Bike. Parts would be added and or modified based on Function and with no regard to looks or Me-Too isms. The goal was to build a purpose bike on the Cheap.
During the Summer before our TAT Trial, we spent weekends riding Fire Roads and Logging Trails in the North / South Carolinas and Tennessee to include 2 extended camping trips where we could test set-ups. The goal was to ride hard and ride fast to see where we and the machines might break.
The crash did 3 things
The Crash – Poor judgment of speed and throttle on my part resulted in a fast low-side crash on the DR in a blind right-handed turn at the top of a hill. The sand covered hard-pack dirt wasn’t going to let my tires take any bite.
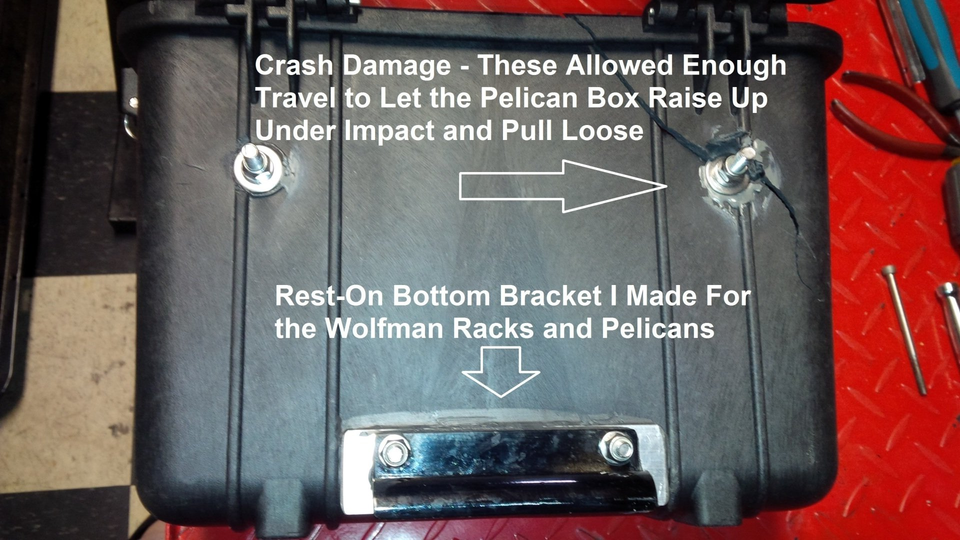
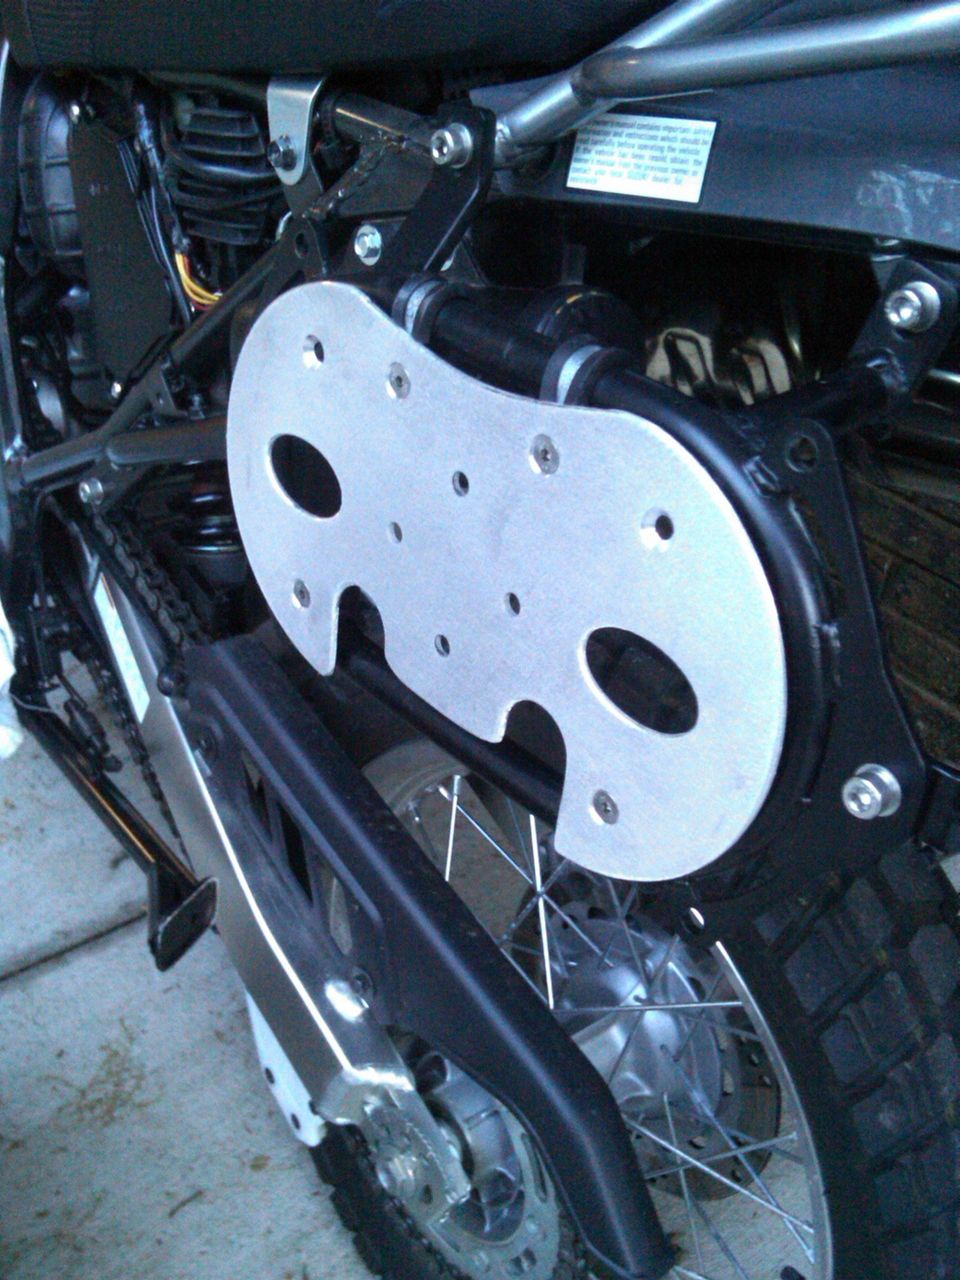
The right side Pelican box came up and off of the lower rack mount. The tubular rack would in fact support the weight of the Pelican box fine and did secure the boxes under normal conditions, but my crash proved that I had to limit movement upward. I have to say that I was very impressed with the Pelican box and just how well it took the impact. Same for the Wolfman Racks I use to support them. The flaw was in the way I did the bottom support. It was a simple “rest on” support and did not stop or limit upward movement. Instead, it relied on the bolts at the top of the Pelicans to do that – something they were not up to task for.
The solution was to add the Aluminum Wolfman Rotopax plates to each side loop and then cut/slot reliefs that allow the bottom Pelican mounts to work as before, only now they would Prevent the bottom supports coming up during a low side impact. The “win-win-win” was that they would add loop rigidity, prevent the Pelican box movement, and provide for RotoPax mounting where/when Fuel/Water was needed – all while being very light in weight.
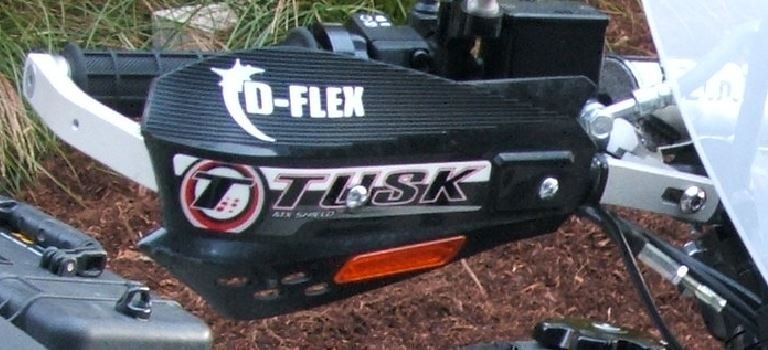
The long skid on the hard dirt road proved that hand guards, AKA “Bark Busters” are worth their weight in gold. My bars, levers, and guards came through the crash perfectly. The ones I installed are Tusk brand and include a small plastic hand shield that does wonders for keeping brush and limbs off your fingers as well as help with cold and wet. These also have the built-in LED‘s for turn signals that do make the bike more visible on the sections of highway we have to travel to get to our favorite off-road track. I did have to modify my stock levers to fit within the travel of the hand guards which was little more than cutting and sanding the ends of the levers off.
The crash demonstrated that the brake (foot) pedal was vulnerable during a drop. The bike went down and skidded on it’s right side – the brake pedal was pushed hard into the right hand crankcase, leaving a deep scratch. Had the pedal hit pavement, a root, or been hung-up by thick grass, I think the pedal could have perforated the right crankcase cover and compromised the oil supply. As was, I had a brake pedal that would not function. We had enough tools with us to pull the pedal out away from under the crankcase and allow me to use it on the limp back to camp.
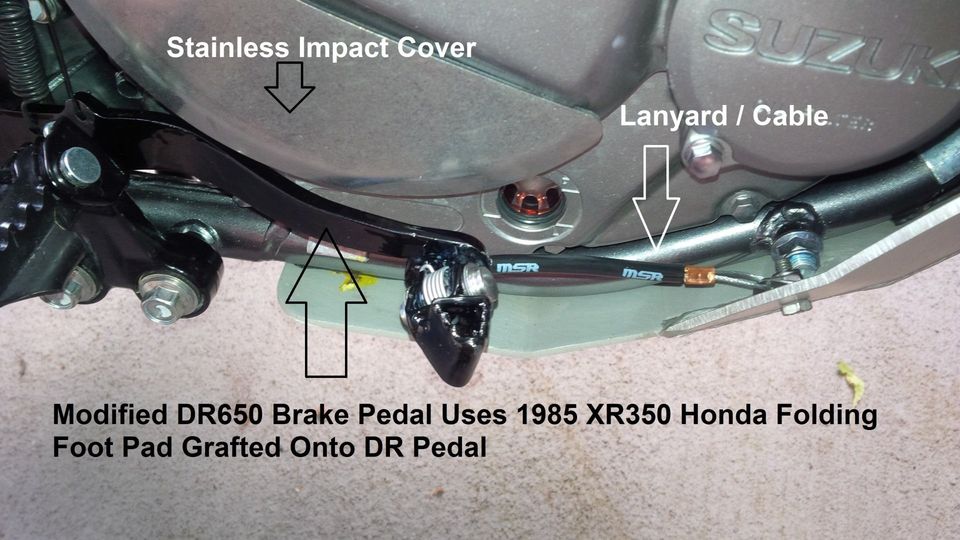
The permanent fix for me was to inspect the stock case cover and determine the scratch was not a threat to long-term oil containment and to add one of the strong Stainless Steel covers available from ProCycle to the crankcase so that would never happen again. I also sourced a folding pedal from an 80’s model XR350 Honda and grafted the toe pad to a new Suzuki DR650 pedal (mine was trashed beyond service). I positioned the foot pad such that it would fold at a 45 degree angle – deflecting in either an upward (fall) or backward (forward impact), or both.
I would also add a lanyard cable between the aftermarket skidplate and the brake pedal. This lanyard serves to prevent limbs, brush, and roots from getting jammed between the frame and brake pedal and to limit the amount of travel in the event of a slide.
The long hours of riding proved that standing during those slower dirt sections was a critical part of covering the 10 hour days. I’m 6 foot in boots and the DR was too compact for me to do that comfortably. I came back from our TAT Trial and invented/built my first edition RRR Adjustable Handlebar Riser System. I also studied the ground clearance of the bike after all of the Suspension modifications and determined that the foot pegs could easily be lowered 1.5″. The combination of lowered pegs and higher bars would make those standing breaks a whole lot safer and easier. I would have more leverage (hands closer to the push-up position and I would not be slumped over trying to hold the bars).
Better yet, my RRR Adjustable Handlebar Riser System would solve the clearance problems with competitor designs.
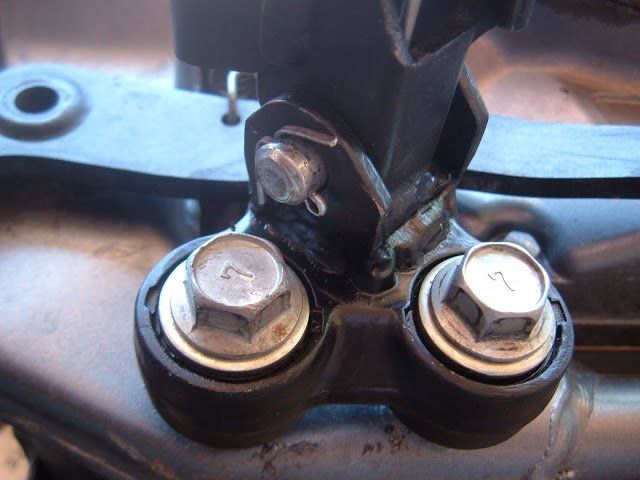
For the foot pegs, I could not simply “lever” them down again as some of the bolt-on lowering brackets do. I wanted to remove as much of the stress (leverage) on the frame mounts as possible while achieving the lowered position – Cutting and Welding the foot pads onto a donor set of DR650 pegs purchased on eBay did that for me. I eliminated a lot of the leverage and stress and all of the height that the stock pegs place on the frame.
We used Roll Charts on the TAT Trial. Wow! I hadn’t done that much math since High School……. Every turn and every intersection, many of which are unmarked required a quick calculation between the odometer’s current mileage and the roll chart’s accumulating mileage for that section. Miss one calculation and you’ve lost the turn and screwed-up the consecutive turns and directions for the rest of the course. Forget GPS except to tell you where you are – they simply are not programmed to keep you on the longest, dirtiest, and off-road route possible and neither of us had one of those heavenly Enduro Counters.
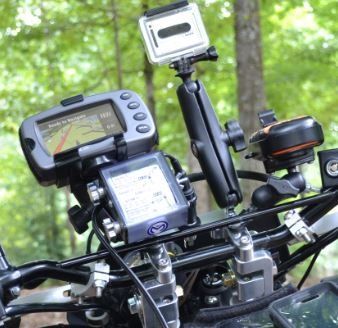
All of this interaction with Odometer, Roll Chart, and the GPS made it perfectly clear – Those items needed to be immediately in front of your eyes. My RRR Adjustable Handlebar Riser would solve this need also. I would make Flat Caps and Dash Accessory mounts that could hold charge jacks and RAM Mounts so all of the navigation tools, and your camera could perch on top of the Steering Stem – thereby having the least amount of distortion and movement possible (versus out at the handlebar ends). This would keep business and the front wheel in the same direction of sight.
This will give us a stopping place for now. In the Part 3 Article, I will cover the Gear and Equipment that I’ve made/designed and purchased to “Gear Up” for Off-Road Survival.