Blog Layout

Motorcycle Aluminum Polishing and Buffing

12991420 • Nov 08, 2015

All of us has one, I’m sure of it. Somewhere in our family of bikes, there is at least one engine in the group that we really like and have been secretely thinking about making Motorcycle Bling out of. Our vintage bikes incorporate their engines as part of the appearance package. For me, nothing adds more to a great bike and it’s looks than it’s engine. On that same front, nothing takes away more from those looks that a dirty, dull, and badly oxidized engine.

1974 Suzuki GT750 Before Polishing

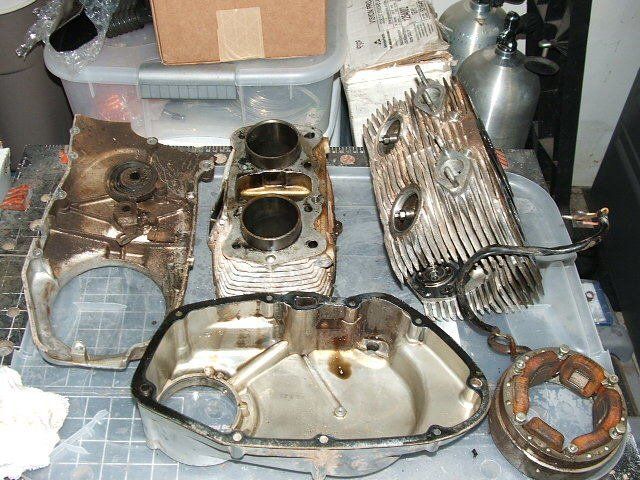
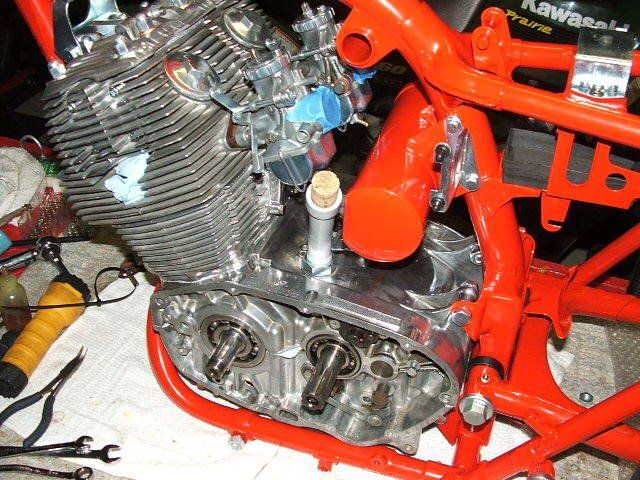
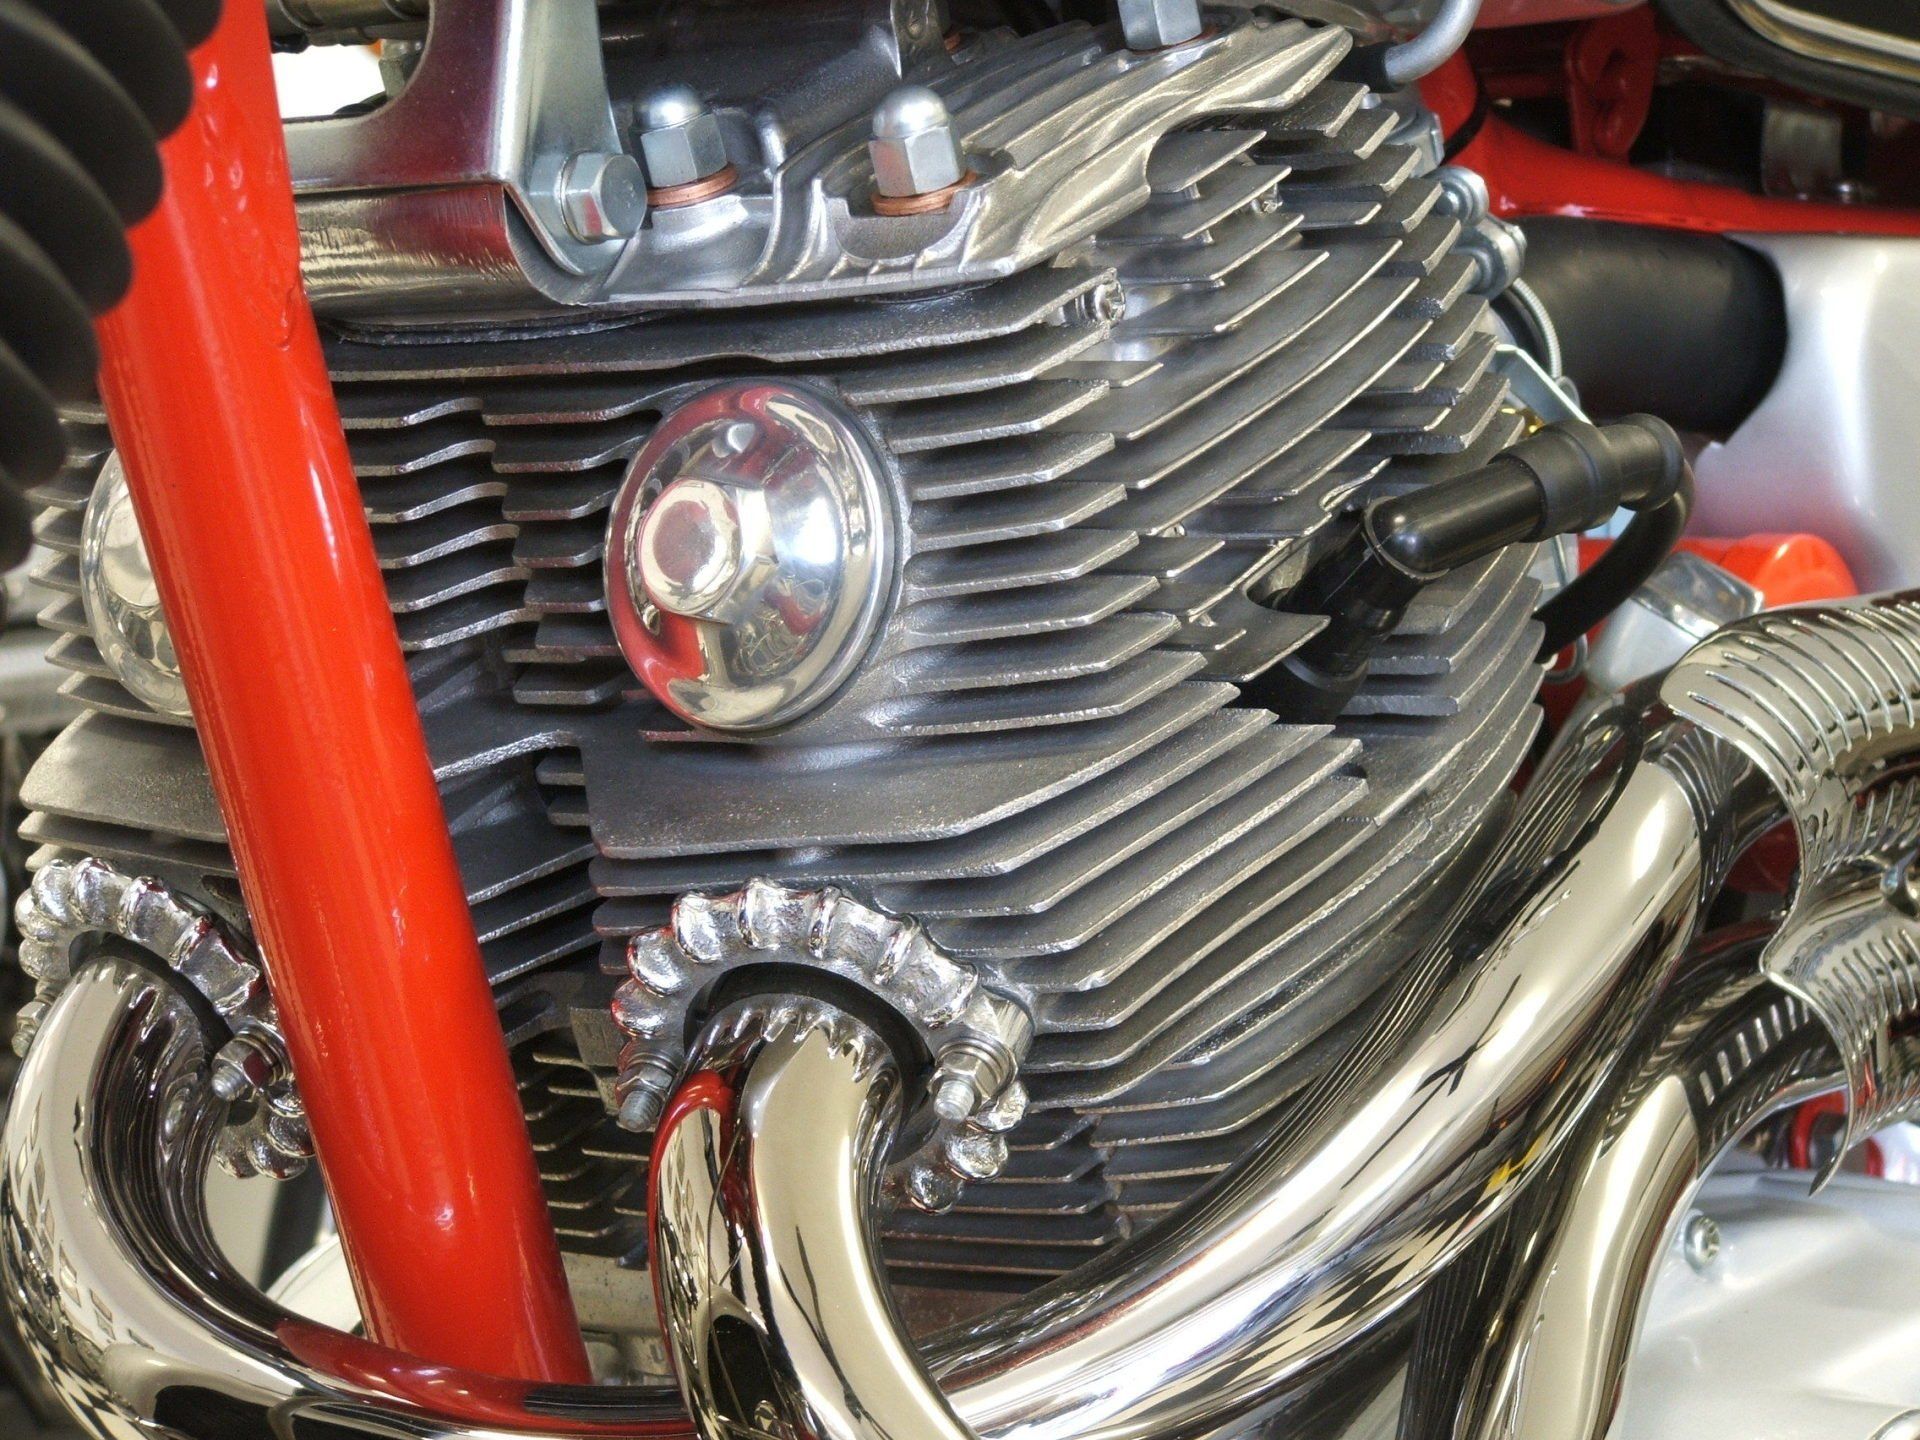
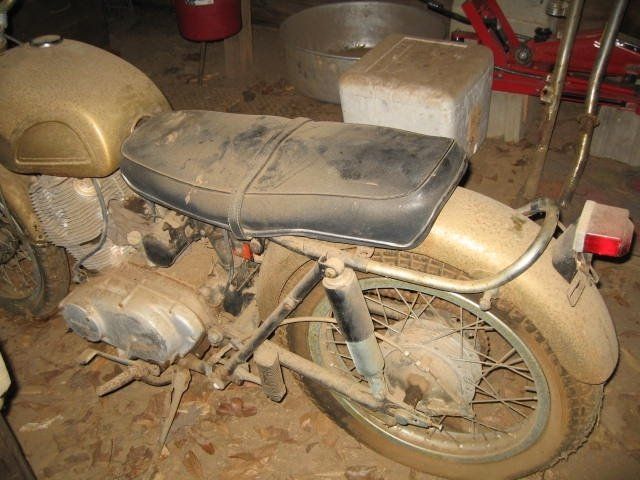
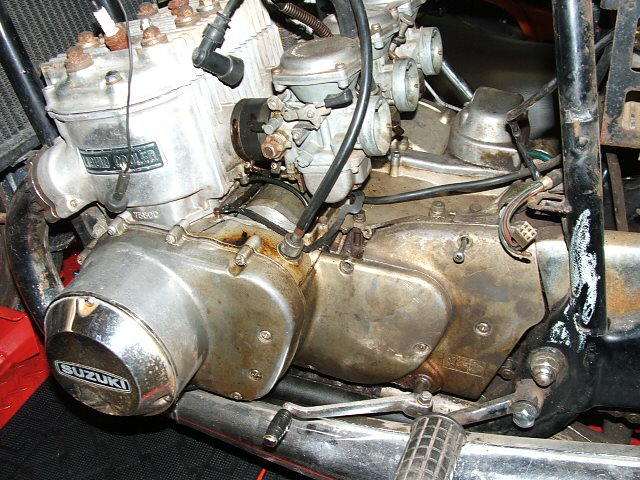
Cleaning, Prep, and Polishing are hard work, but doing these with some planning and attention to detail will be very rewarding. We can erase decades of neglect and exposure in just a few hours. We’ll start with my 1974 GT750 Suzuki often referred to as a “water buffalo” or “kettle” because of it’s use of water-cooling. 2 Stroke, 3 Cylinder, engine. This is easily one of my favorites and most memorable restorations that took me a full year to complete, but as you see the results and attention to detail can be seen at every angle. I did the 1965 Honda CL77 305 Street Scrambler a year later and followed the same steps and procedures to get the results you see.


Before we ever plug the buffer into the wall, Eye Protection! We are dealing with speeds, metal, and something will fly. Trust me, 30 seconds of buffing and your googles or face shield will have debris.

Honda 1965 CL77 305 Engine Tear Down

Please, please don’t plug in until you’ve got the proper eye protection. Go naked if you like, but wear eye protection and don’t lose your eyes.


You need to start your polishing/buffing projects with clean parts. All grease, oils, dirt, and grime have to be removed. Before you throw the parts in a blast cabinet, know that bead blasting will make the work harder. Try cleaning then with solvent and a brush – yes it takes longer to clean, but those tiny pits you create with bead blasting will take a lot longer and far more effort to smooth/level with buffing. That shiny aluminum metal comes from getting the surface flat and smooth. The beads will dimple/pit the soft metal and you’ll work a lot harder to remove the almost microscopic dimples.

Honda CL77 305 Scrambler Polished

On many parts, especially the large surface areas, I use 1,000 and 2,000 grit paper and wet sanding to get the surfaces smooth by removing the oxidation and unwanted texture. This wet sanding of 1000 and 2000 also reduces the chances of having wavy or distorted surfaces. On small parts where waves and distortion are not a concern , I take them straight to the medium grit (brown) compound and my 1,650 rpm 1 hp buffer. I then clean the part again and follow-up with White rouge and what is known as a Finish Buff wheel mounted on the other side of my 1,650 rpm buffer.


My favorite and personal choice of buffing equipment is the 1,650 rpm buffer and stand with 10″ and 12″ buff wheels of at least 2″ wide. I have tried to use the smaller bench grinder type and those are almost always 3,800 rpm – way too fast for good results and are extremely dangerous in my opinion. When parts get caught or pulled by the 3800 rpm – they become missile projectiles – not good for you or the part! I’ve had far too many near misses and rarely got the results that I wanted when using the 3800 rpm machines. Why the poor results? Too much heat. One last thing about buffing with 3800 rpm, I’ve seen a choke linkage rod go through the metal siding of the shop where a friend of mine had his buffer wheel snatch it from his hands with a bench grinder conversion to buffer.

1965 Honda CL77 305 Engine

Let’s talk about heat. Heat and just the Right Amount of it are the magic to buffing. Those bricks of compound that you use to load your wheel with use a component that may surprise you – Animal Fat. Yes, Animal Fat is used to make the blocks. It’s the idea medium to carry and release the aggregate “as needed”. Heat is so important to the buffing process because it takes 140~150F degrees to melt the fat at the surface and release new aggregate. As the fat melts, new aggregate is released/exposed. Practice using the buff wheel to get the part up to temps (140~150F) and keep it there. You’ll be amazed at how much faster and deeper the shine on your part becomes.


How do I know when it’s “just right”? Those cheap, 100% Cotton work gloves that are just about everywhere and rarely cost more than $1 per pair, are Perfect for wearing while you’re buffing! They will let you feel the heat, but still hold onto the part. 150 degrees is about the max you can/want to hold with these gloves. If your parts are turning black – you’re too cold. Can’t hold the part? – you’re too hot and wasting aggregate because it’s now a liquid and just slinging off. Even after years of practice and an understanding of the Heat factor, I still cannot use the 3800 rpm buffers because the parts just get too hot. The speed and small surface area of contact that the smaller/faster wheels have don’t give the part time to cool or maintain the magic 150 degrees.

Barn Find 1965 Honda CL77 305 Scrambler

One last Caution about your buffing – That compound has animal fat to hold it together. Dogs and Cats both will eat it and compound is not healthy for either of them. Whether it’s Buck or Kitty, keep your compounds away from their reach – store the bricks where they won’t be able to find them.


Now, Make ‘Em Shine!

SIGN UP FOR OUR NEWSLETTERS


Contact Us

06 Apr, 2018
Welcome to the first of several boating set-up and discussion articles that I plan to add to this Public Service Articles platform. These are being added as a public service to readers who can’t find the odd facts and principals affecting boating performance questions. I’ve spent 50 years wondering and searching for “What/Why boats and […]
By 12991420 06 Apr, 2018
Stressing Out Your Transom is an article that I wrote for Bass & Walleye Boats magazine and their March 2001 issue. I defined many of the terms used in set-up and discussions about jackplates, bolts, setback, transom stress, and leverage. The research took me several evenings at the Clemson University Library along with several phone […]
By 12991420 19 Mar, 2017
Motorcycle Gasket Sealer, Liquid Gasket, and Liquid Engine Sealant are the most common terms that people refer to the “Goo” that they use during the reassembly of their engine cases. Please read and shop carefully – the sealants and gasket goos that are sold at most auto stores and hardware retailers are almost always WRONG […]
By 12991420 20 Oct, 2016
The Modern, Manual Motorcycle Clutch does a lot more than the textbook definition of this word Clutch suggest. While the definition is “to Grasp, Seize, Clench, and Hold”, we think of them as quite the opposite. Mention Clutch and most of us will describe the Slipping Action that allows us to control engagement and movement […]
By 12991420 13 Oct, 2016
Understanding The How and Why It Works A Transmission is defined as a mechanical assembly (machine) that transmits power from the Engine to the Final Drive. The simplest transmissions can have just one, fixed ratio and no shifting. This article will expose the detailed workings of the 6-speed motorcycle transmission, but the 4 and 5 […]
By 12991420 24 Sep, 2016
He Was Here – We Know It Because He Left His Helmet! Rumors have it that Kawasaki kept pushing the envelope in performance and then in 2035, the H222 finally exceeded Warp. The daring rider who was willing to test anything with an Electron Dynamo Fusion Engine was given the nickname “Warp” and sadly never […]
Show More
Share by: